
What is DHCP and why does it need to be done on the Iridium Pilot?
Dynamic Host Configuration Protocol (DHCP) is a protocol for automatically assigning dynamic IP addresses to devices on a network. With dynamic addressing, a device can have a different IP address every time it connects to the network.
This is needed to make your Pilot work! Its done by US. But if you need to read on..
Enable Static IP
Its easy to configure, so here's how to do it below; (Can be done at home or in an office too)
Step 1
Ensure that you have plugged all the necessary cables into the Pilot and that it is switched on.
Check list below;
PILOT BELOW DECK GREY BOX
- Power cable
- 20m antenna cable to the white dome antenna
- Ethernet data cable from 'data' port on grey box to Ethernet port in PC or Mac
Step 2
You will need a PC or Macbook for this. (Note: you may need a thunderbolt to ethernet adapter for Mac)
Mac instructions below
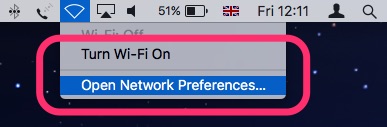
Go to the wireless networks tab located on your computer. (Top right) Switch off the wifi function and select 'Open Network preferences'.
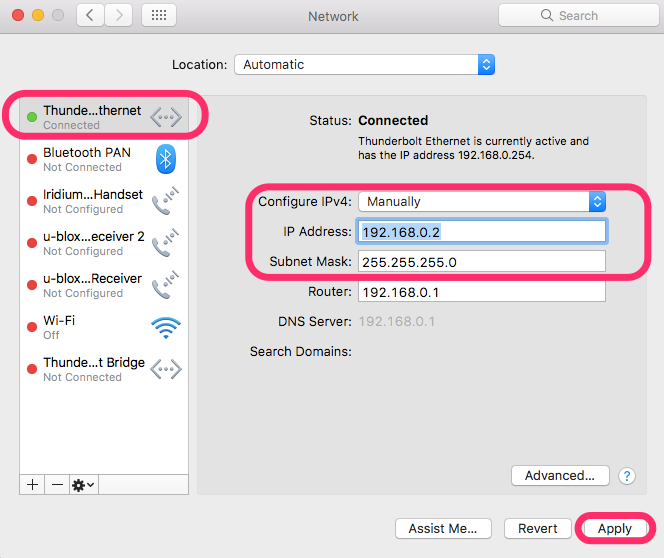
Select the Ethernet Port the Pilot has been plugged into. Go to the 'Configure IPv4' and select 'Manual'.
Change the settings as follows
- IP address - 192.168.0.2
- Subnet Mask - 255.255.255.0
...then click 'Apply'.
When applied, you will now be ready to go to the Iridium Pilot portal page and change some necessary settings.
Enabling DHCP on the Pilot
Step 1
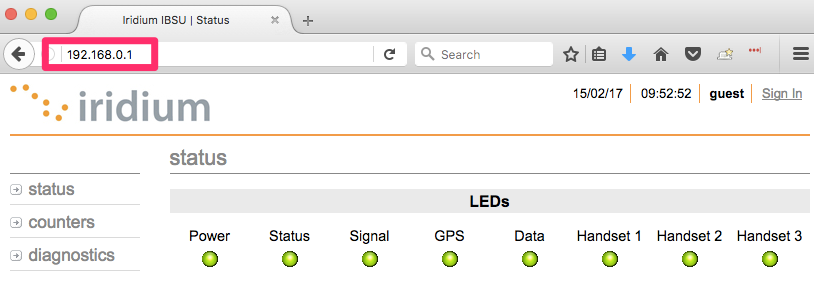
In a Web Browser like Google Chrome or Mozilla Firefox, precisely type 192.168.0.1 into the address bar and press enter. This will take you to the Pilot Portal page.
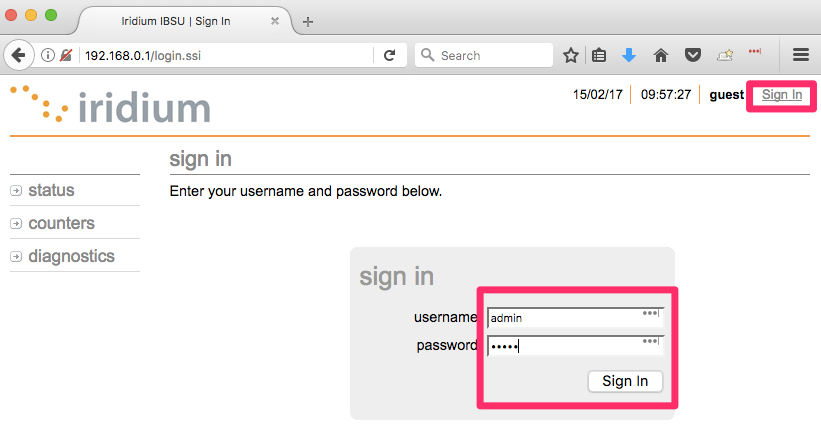
You would need to log in to change the DHCP setting and turn it on. To do this, Go to the 'Sign in' tab top right of the screen.
- Username: admin
- Password: admin
(as shown on screen shot)
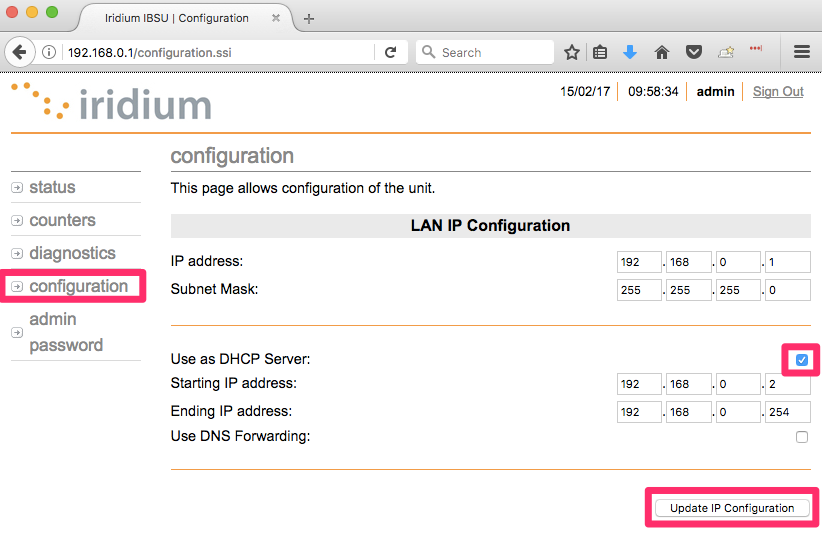
Once logged in, click on the 'configuration' tab.
You will then be taken to the configuration screen. Here you will put in a 'tick' to activate DHCP.
For the Pilot to save the changes and take effect, click on 'Update IP Configuration'.
Click 'Yes' to change the above. The Pilot will now start to reboot.
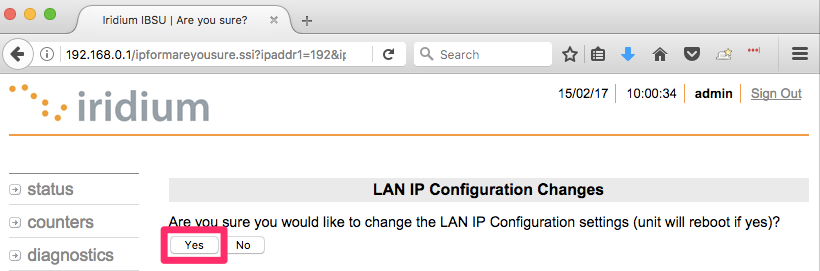
The vertical light on the Pilot will go out, then appear Red, then Green. This will illustrate the reboot is finished.
Step 2
On the Iridium Pilot portal page, click 'sign out' (top right) and then proceed below to opening up the computers networks tab again.
Revert Static IP settings to DHCP
Now change the Pilot Ethernet configuration from 'Manually' to 'Using DHCP'
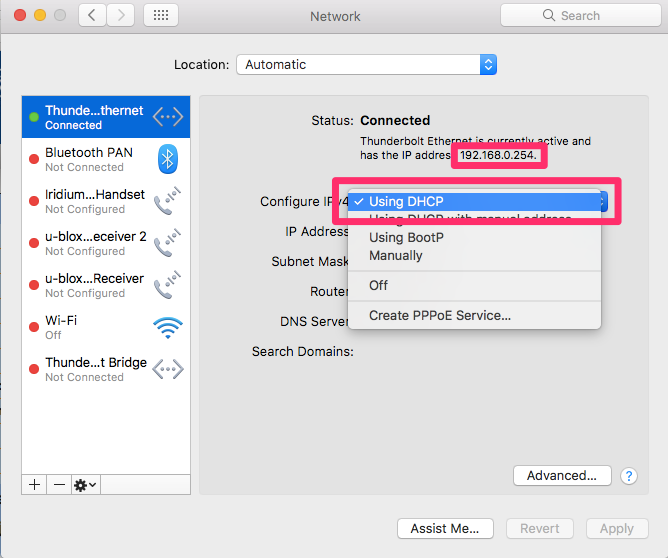
Final check - Go to the top of the networks tab and it should mention the new IP address of 192.168.0.xxx which has 3 random last numbers. (Screen shot above)