This writeup was contributed by one of our Mac customers. Any questions or suggestions for improvement please email them to: support@mailasail.com
- Assuming that the mac has USB connection ports then you will need a USB to serial adapter. Mine is a Keyspan USA-19 serial assistant. in order to make this work you need a driver which can be down loaded from www.Keyspan.com (if you are using OS 9.0 and above just plugging the adapter in will cause a msg to appear that “this is an unknown USD device, do you wish to search for a driver on the internet”. Answer yes and if you are connected to the web it will get it automatically for you)
- The following is based on using that adapter.
- This adapter then needs to be connected via a 9 pin serial cable to the Iridium modem, which in turn needs to be connected to the phone.
- This needs to be data enabled and switched on.
- Assuming that you have standard dial up facilities to an ISP then you need to configure as follows.
The Modem control panel.
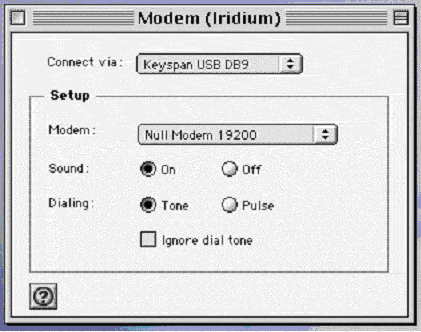
Open Modem control panel and from File make a duplicate configuration active. Rename this "Iridium".
On a normal setup you would have two "Connect via" options - "Internal Modem" and "Infrared port". With the Keyspan 19 inserted you should also see "Keyspan USP DB9" in the "Connect Via" options dropdown menu. Select this. (If you do not, check the control panel to see if the Keyspan software has been activated – if you are running on on base OS settings it will not be active).
Assuming it is activated then in the drop down menu "Modem" select "Null Modem 19200". Settings for sound should be on, dialling – irrelevant, but check “Tone” anyway, and leave "Ignore Dial Tone" unchecked.
Save these settings.
The Remote Access control panel
Open the Remote Access control panel and from File make a duplicate configuration active. Rename this "Iridium". On the open dialog box you see three fields to fill in:
In the first two put whatever are the settings you normally put in to dial up your ISP. Put your ISP dial up number in the Number field, but you only need to do this for reference.
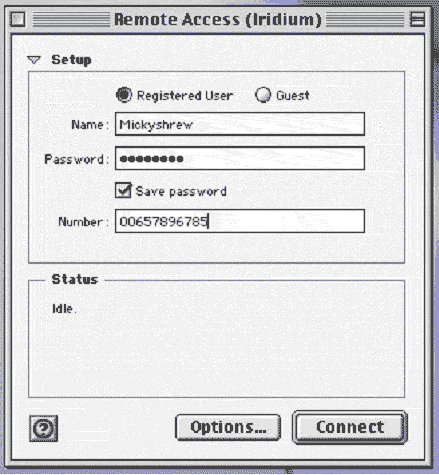
Then click the options button on the bottom of the box, this takes you to the options page:
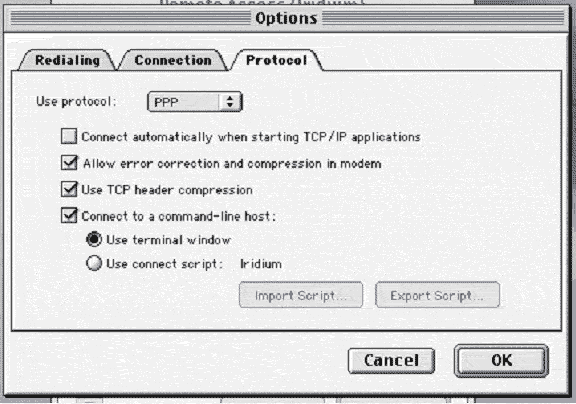
- Click "Protocol"
There are four check box's
- Connect Automatically when starting TCP/IP applications
- Allow error correction and compression in modem
- Use TCP Header compression
- Connect to a command line host
The first one is your preference, but I have left it unchecked to avoid inadvertent start up.
- Check the next three.
- Check the “Use Terminal Window” radio button.
- Click the okay button
This takes you back to the main dialog box.
Leave this open
The TCP/IP control panel
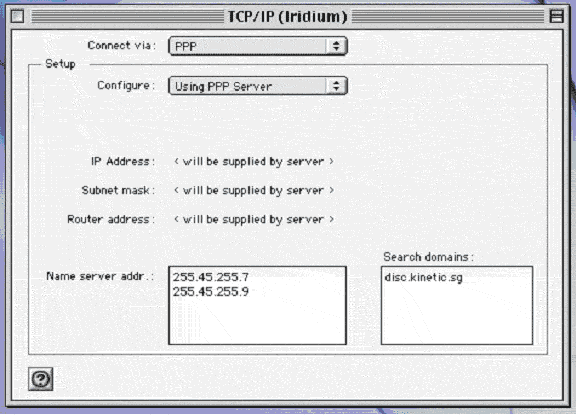
Open TCP/IP control panel and from File make a duplicate configuration active of the ISP settings but do not change settings forom that you would normally use for your ISP. Rename this "Iridium"
Save these settings.
Go back to the Remote Access dialog box and click the "Connect" button.
This will bring up a Terminal PPP dialog box.
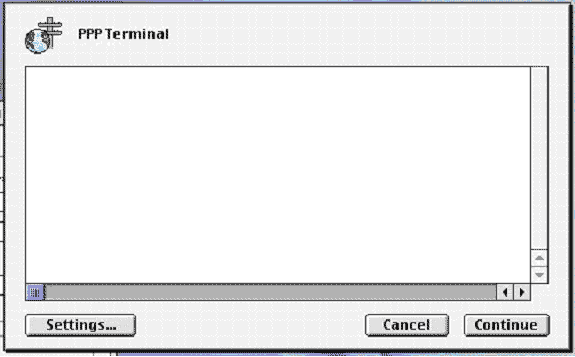
Type in AT and Return <checks connection>
- Should get OK if the settings and connections are okay.
Type AT&F and Return <resets any previous commands which did not leave the modem in its normal state>
- Should get OK
Type in ATDT <ISP Dial-UP number>, which should include the full international dialling string and Return.
- If successful and when connected you will see a msg "Connect 19200"
Then click the "Continue" button. It will ask you if you want to save the script, click cancel (see below).
This will return you to the main dialog page where you will see in the status box "Starting PPP", then "Authenticating", then "Starting Network Protocols" and finally the normal connect information. Except that it does not give the baud rate. Which I believe is because it gets that from internal modem and of course in this case its external.
Now:
- Mail can then be started as normal.
- (You can test the system by first plugging in your home number, if it rings then there is no reason why it should not work on your ISP provider)
- The whole process can be automated by using a connect script. To do this, after entering for the first time the above modem command scripts click “continue” save the script. Then on subsequent connections reset the “Protocol page by instead of checking the radio button “Use Terminal Window” check “Use connect script” and follow the instructions to import the previously saved script.
- Finally if you use the Apple Location Manager this can then be set up with an “Iridium” Location reflecting the three control panel settings.
- Many older macs with no USB slots had two possibilities for modems. The modem card slot at the side, which took a modem card or the round pin Modem/Printer port at the back. This slot must be used to connect to the Iridium modem via a mac round pin – PC 9 pin Printer/serial cable adapter.
When this is connected you will see two choices in the "Connect via" dropdown box. Choose "Modem/Printer Port", the other settings are same.
I do know that the only difference with the above on a old 190 powerbook is that the control panel "Remote Access" is called "PPP" in operating systems up to and including OS 8.0.


